Weekly Workflow
How entries move from submission to a sent campaign, week over week.
Moving Entries on the Board
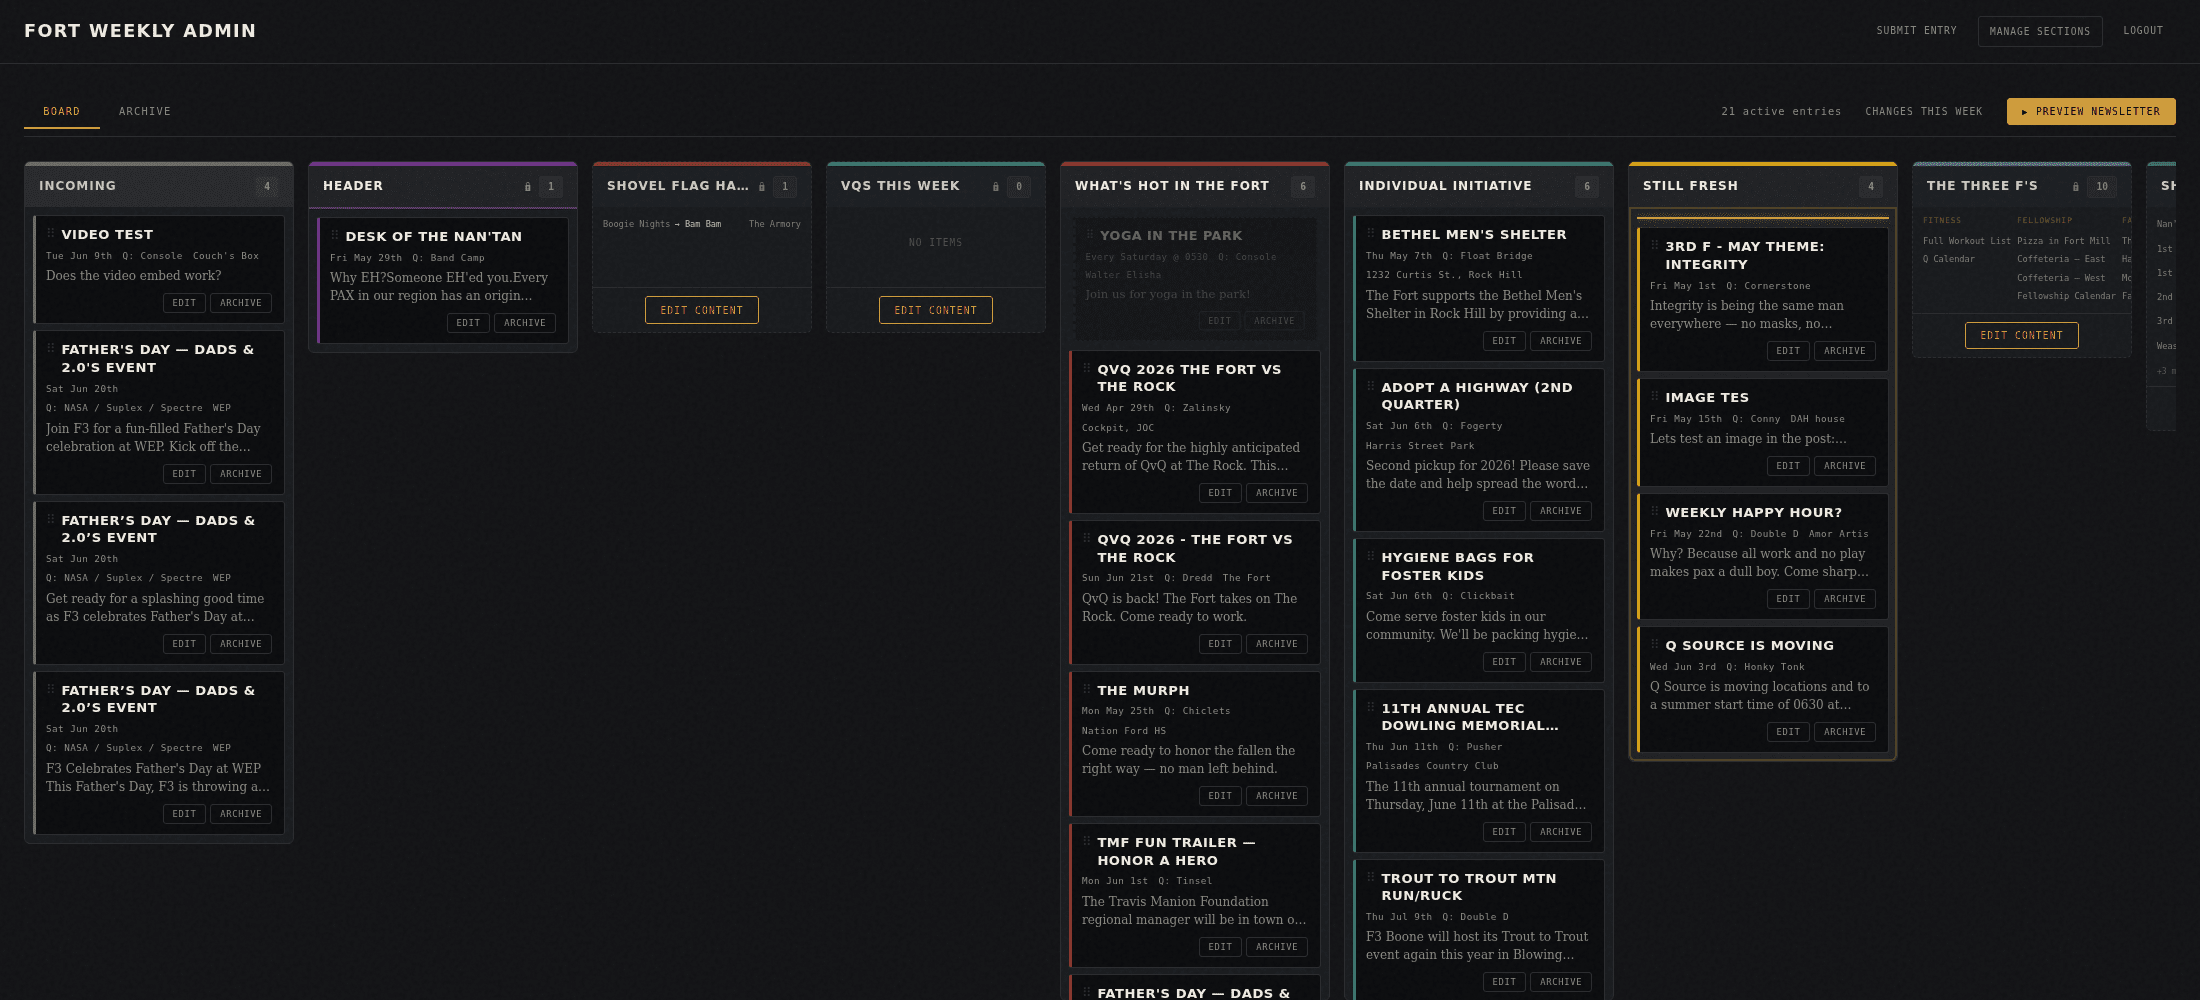
The Board tab is a kanban view. Every submitted entry starts in Incoming and needs to be dragged into a section lane before it will show up in the newsletter.
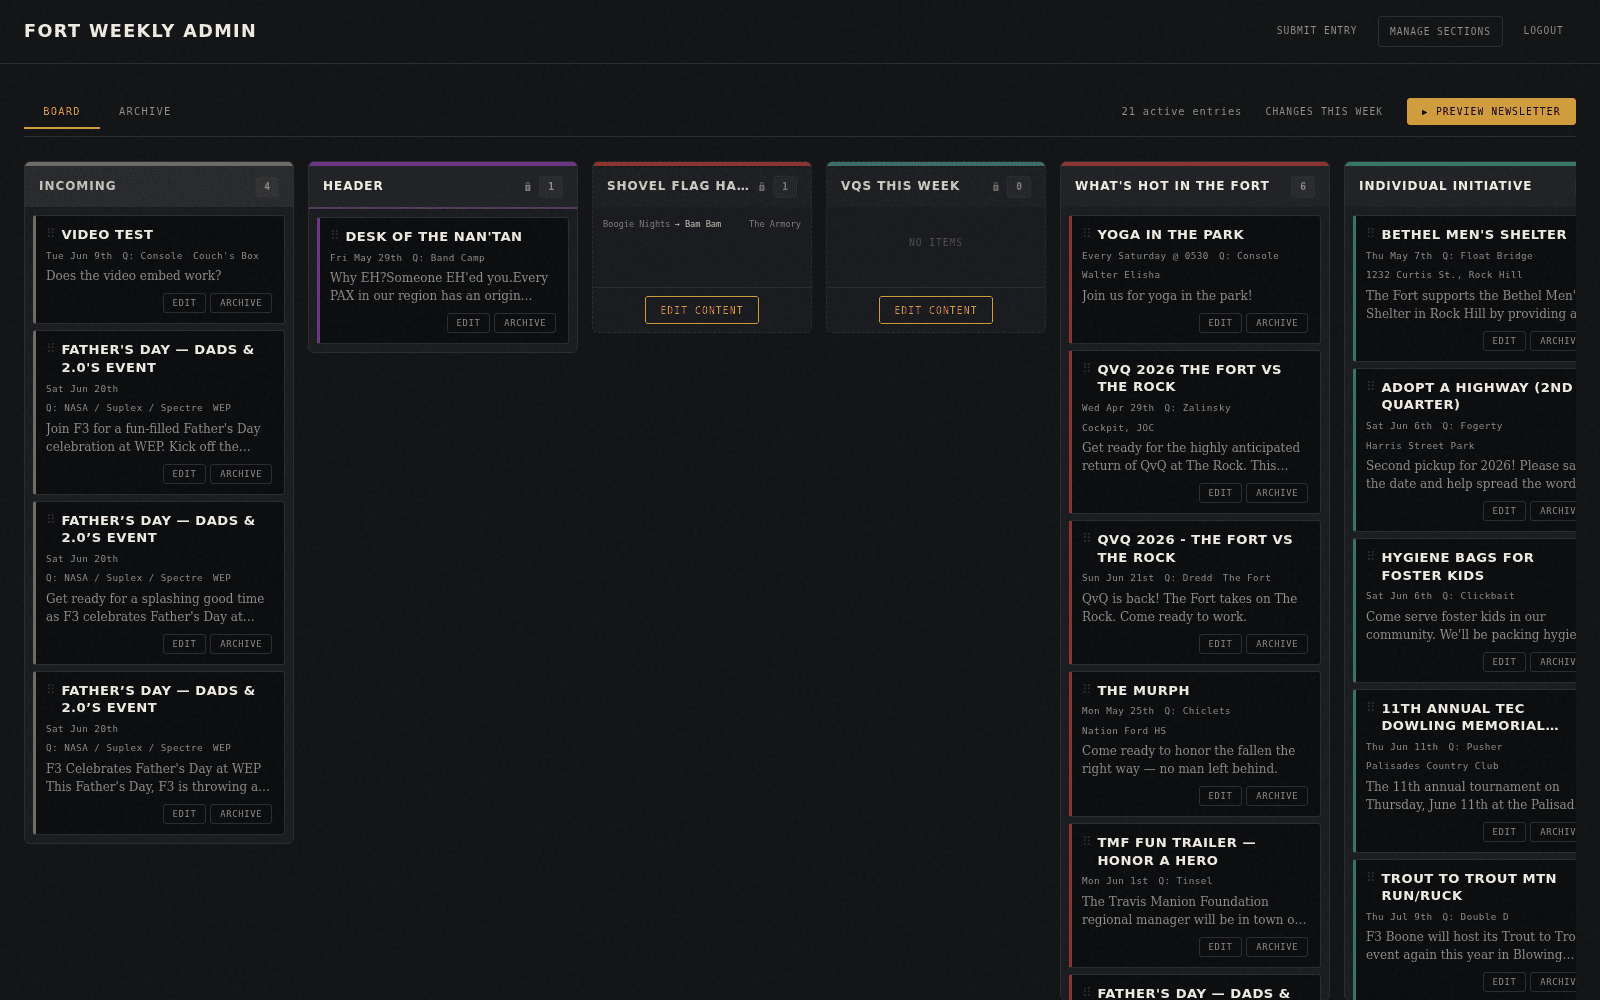
- Grab a card by its ⠿ handle in the top-left corner and drag it into the lane for the section it belongs in.
- Drop anywhere in the lane — the card lands at the bottom; drag within a lane to reorder (position controls the order it prints in the newsletter).
- The lane you drop into highlights with an amber border while you're hovering over it, and a drop indicator shows exactly where the card will land.
- Shovel Flag Hand-off, VQs This Week, and The Three F's are static content blocks, not entry lanes — use their Edit Content button instead of dragging cards there.
Editing an Entry
Click a card's title or its Edit button to open the full entry — useful for cleaning up typos, fixing dates/times, or adding a hero image before it goes out.
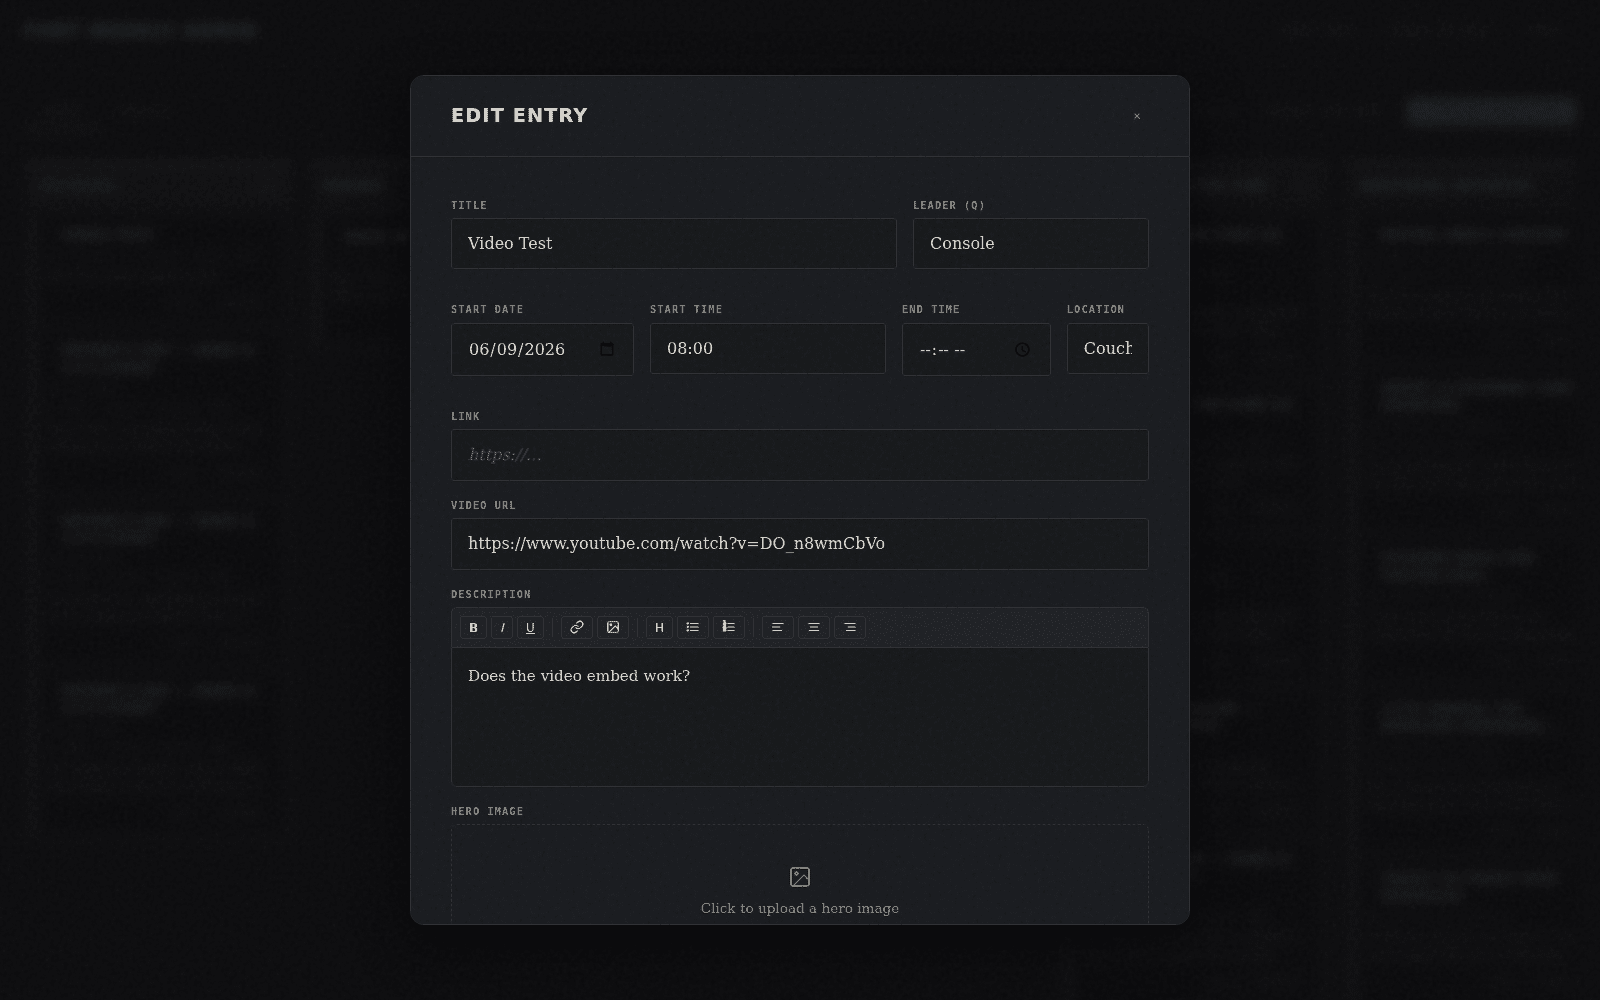
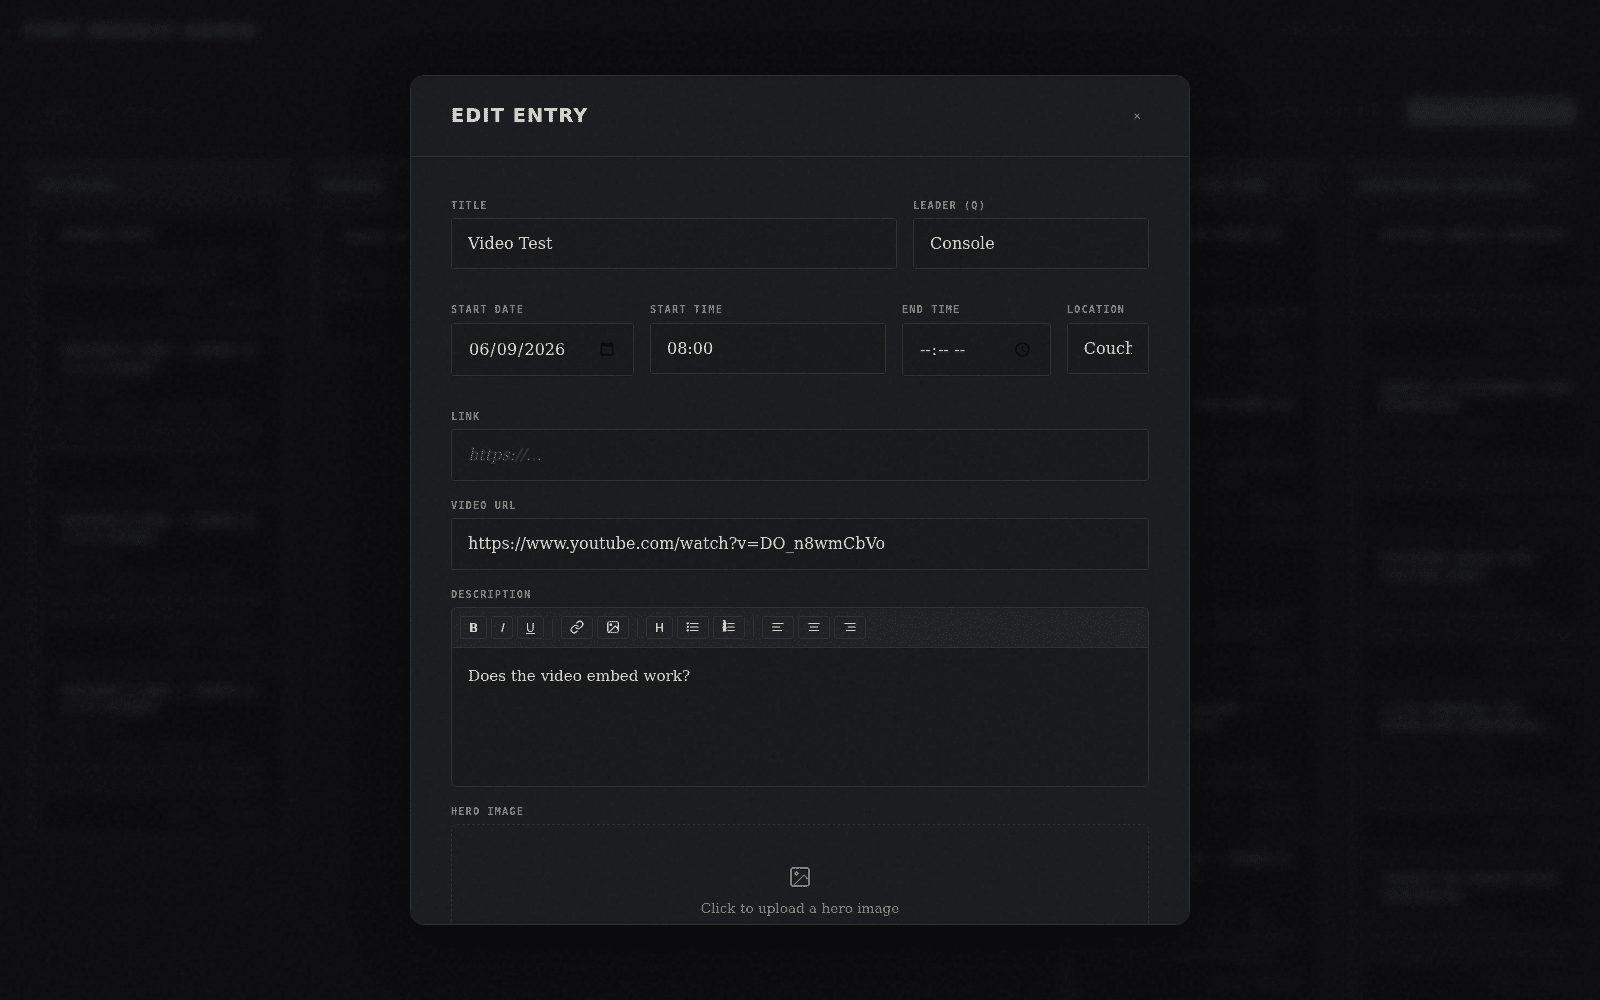
- Edit any field directly — the description field is a rich editor (bold/italic/underline, links, images, headings, lists, alignment).
- Optionally attach a hero image (max 5MB) — it renders at the top of the entry in the newsletter.
- You can also reassign the entry's section from the dropdown in the modal footer — a shortcut for dragging on the board.
- Click Save Changes to persist edits, or Close to discard and exit without saving.
Archiving & Restoring
Entries that are done, duplicated, or shouldn't run don't need to be deleted — archive them instead. Nothing is lost, and it keeps the board clean.
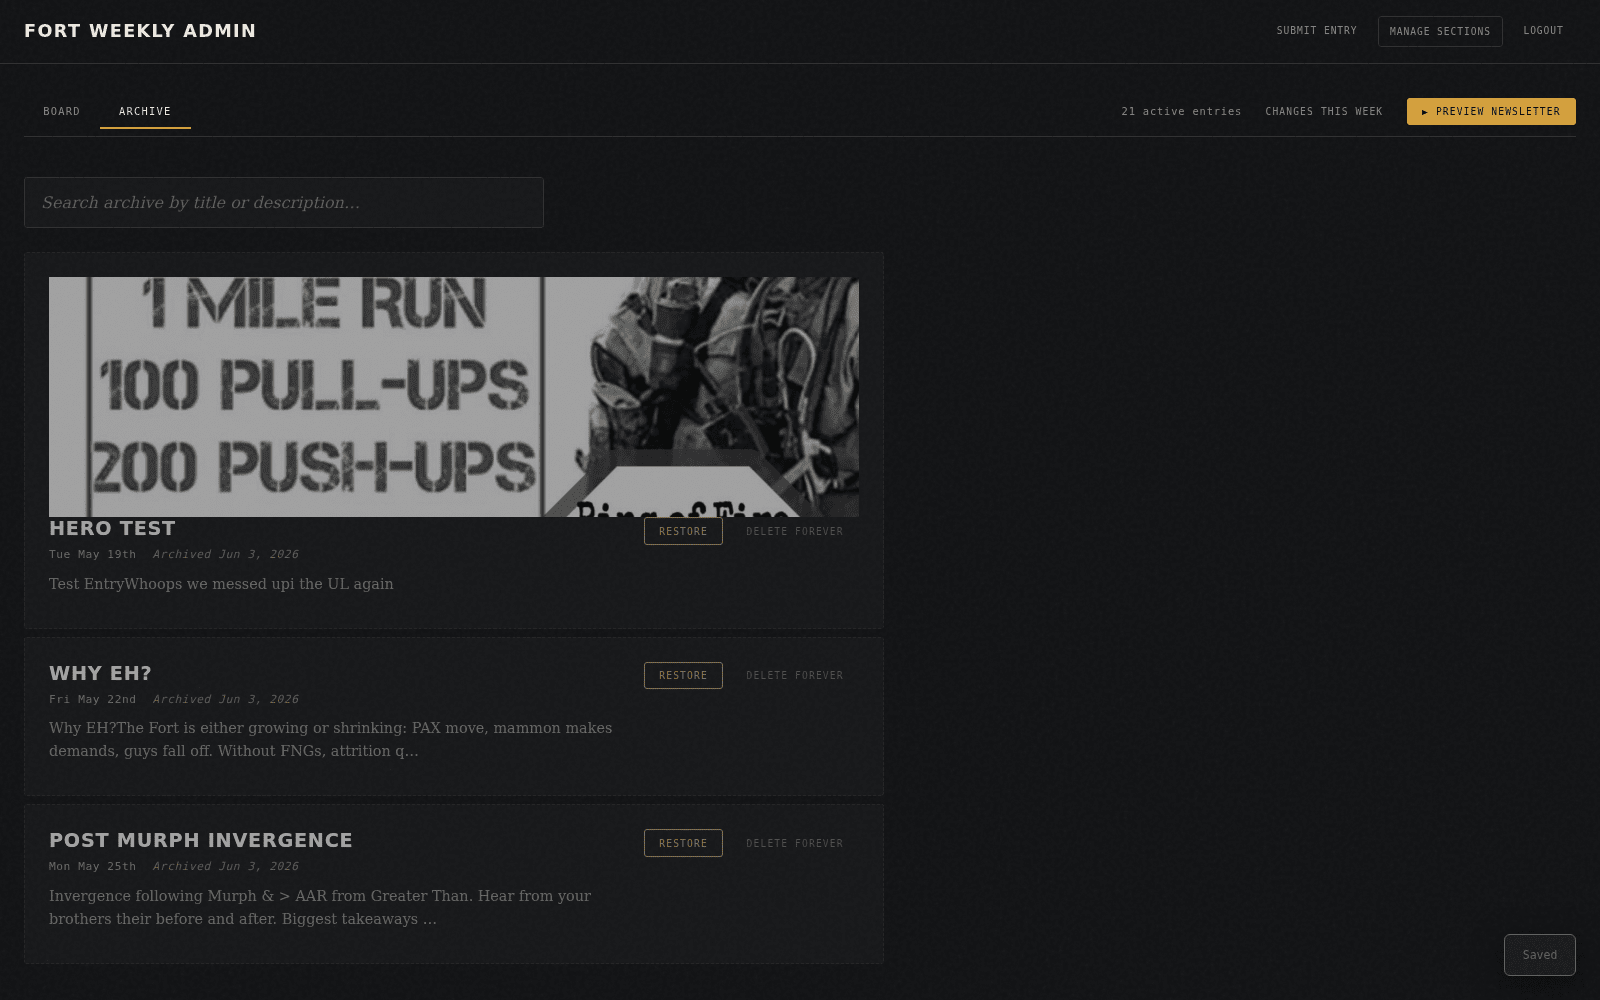
- Click Archive on a card (or Archive Entry inside the edit modal) to pull it off the board.
- Switch to the Archive tab to browse or search archived entries by title/description.
- Restore sends the entry back to the Incoming lane, unsorted — you'll need to drag it into a section again.
- Delete Forever is permanent — use it only for genuine duplicates or spam, not routine cleanup.
Managing Sections
Sections are the columns of the newsletter itself. Manage Sections in the top nav controls which ones exist and what order they print in.
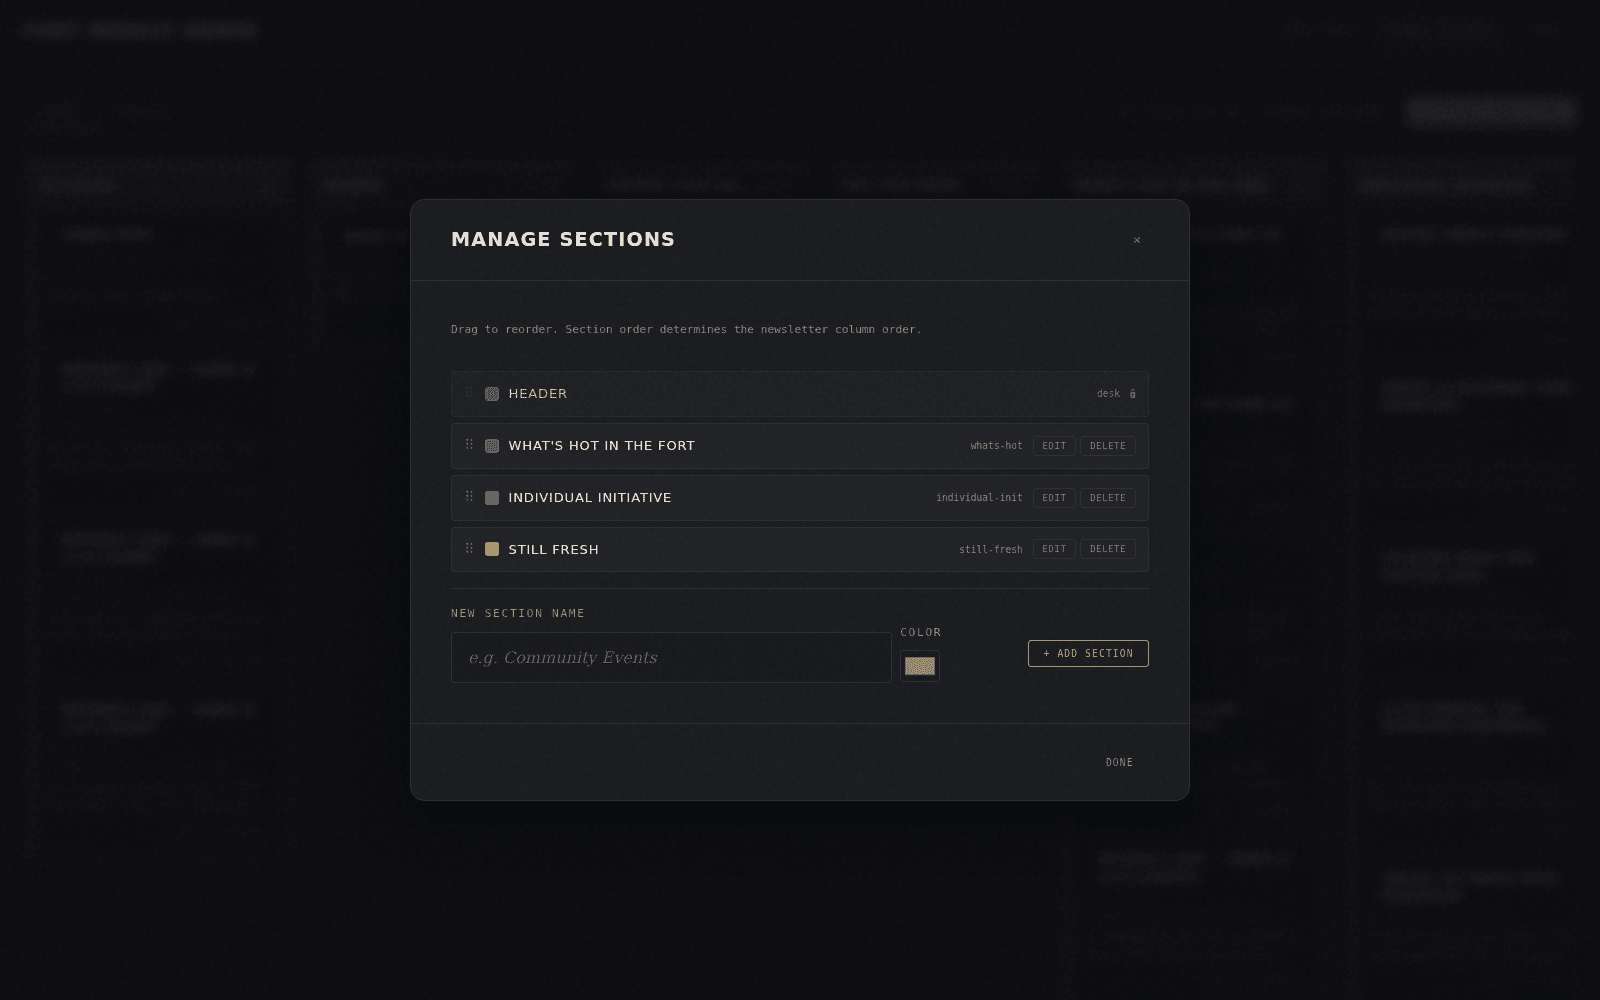
- Drag a section row by its handle to change where it prints in the newsletter.
- Header (the Nan'tan's desk) is locked first and can't be reordered or deleted.
- Add a new section with a name and accent color, or Edit/Delete an existing one — deleting a section returns its entries to Incoming rather than deleting them.
Previewing the Newsletter
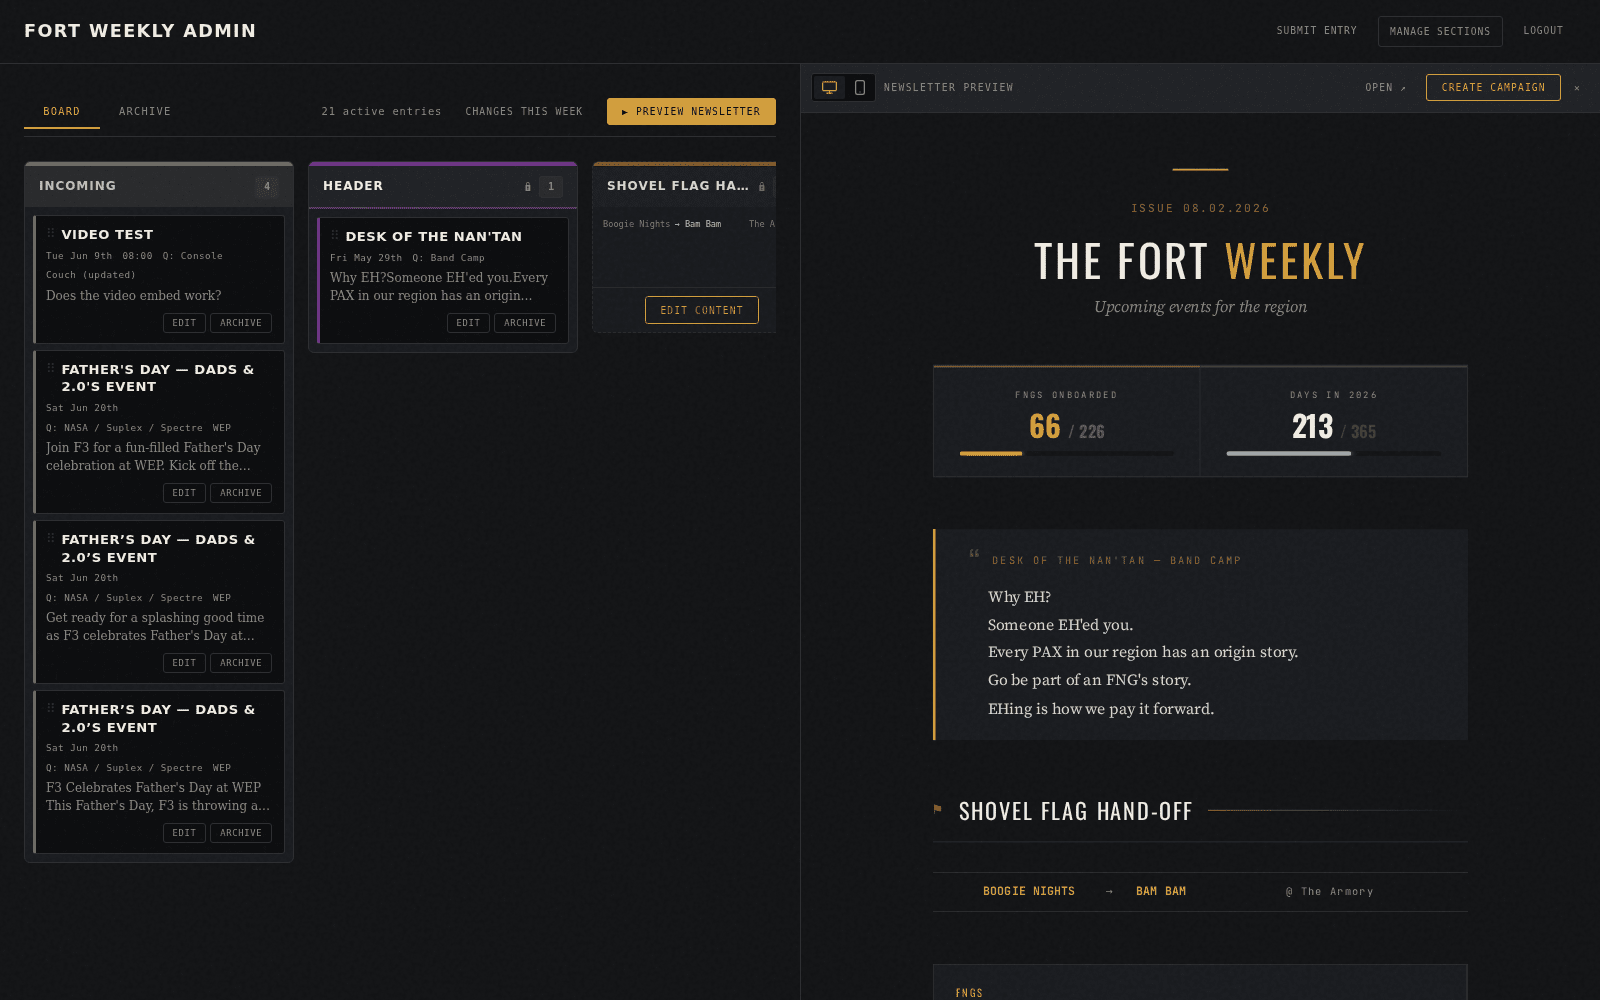
Once the board looks right, click Preview Newsletter to render the actual issue from current data — this is the same HTML that eventually goes to Mailchimp.
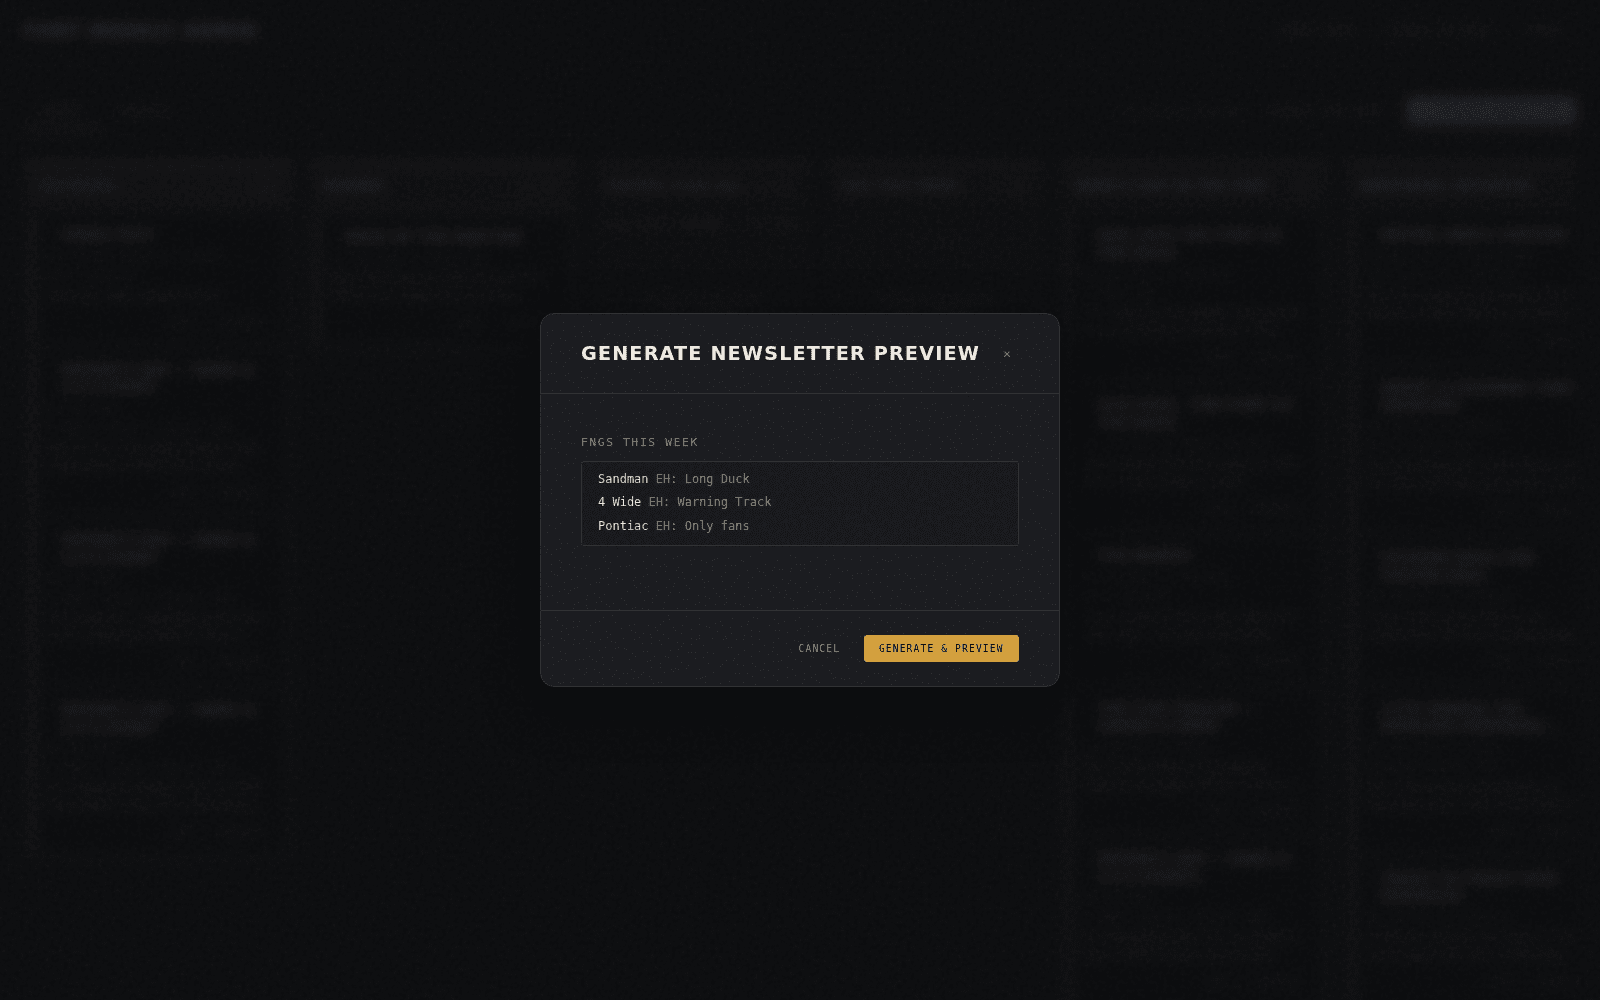
- Click Preview Newsletter, review the FNG list, then Generate & Preview.
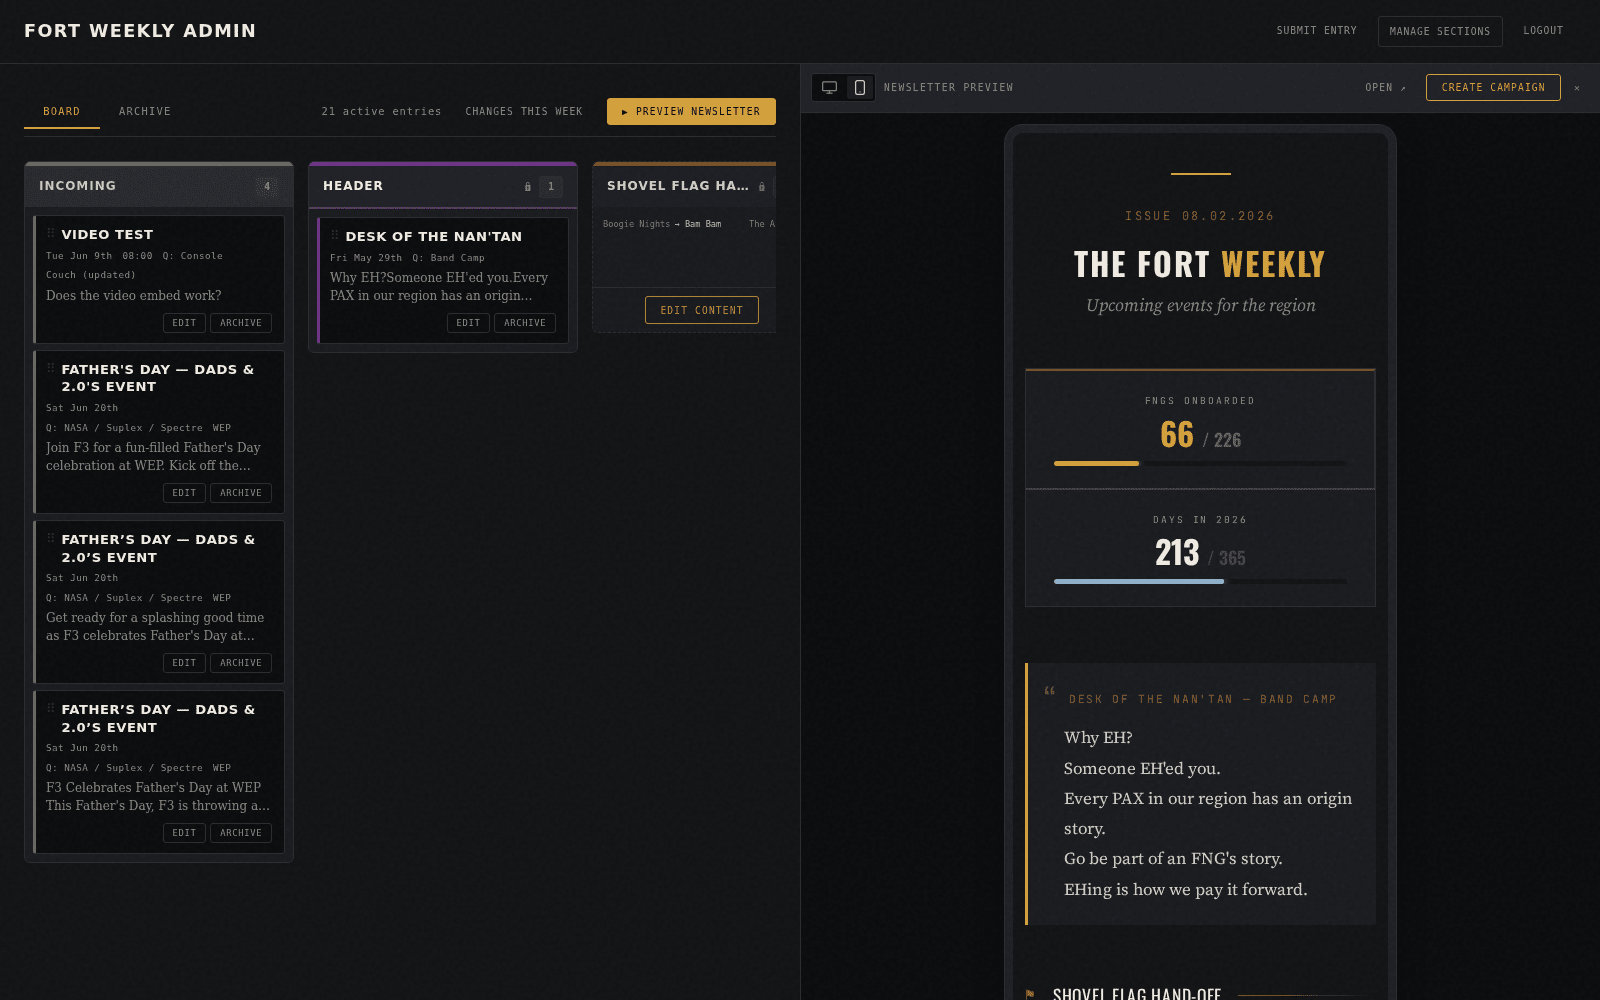
- The right-hand pane renders the generated issue in an iframe — this is a live build from the current board, not a cached copy.
- Toggle between the desktop and mobile (375px) icons at the top of the preview pane to check both layouts.
- Use Open ↗ to view the full page in a new tab, or the ✕ to close the pane.
Generating & Updating the Campaign
Once you're happy with the preview, push it to Mailchimp as a draft campaign scheduled for the next Sunday. This does not send the email — it only creates or refreshes the draft.

- Generate a preview first — the campaign button only appears once a preview exists for this session.
- Click Create Campaign to build a new Mailchimp draft, scheduled for the upcoming Sunday at 8pm Eastern.
- Made more edits after creating it? Generate a fresh preview and click the button again — it now reads Update Campaign and overwrites the draft's content in place rather than creating a duplicate.
- Sending or final scheduling still happens in Mailchimp itself — this button only keeps the draft in sync with the board.
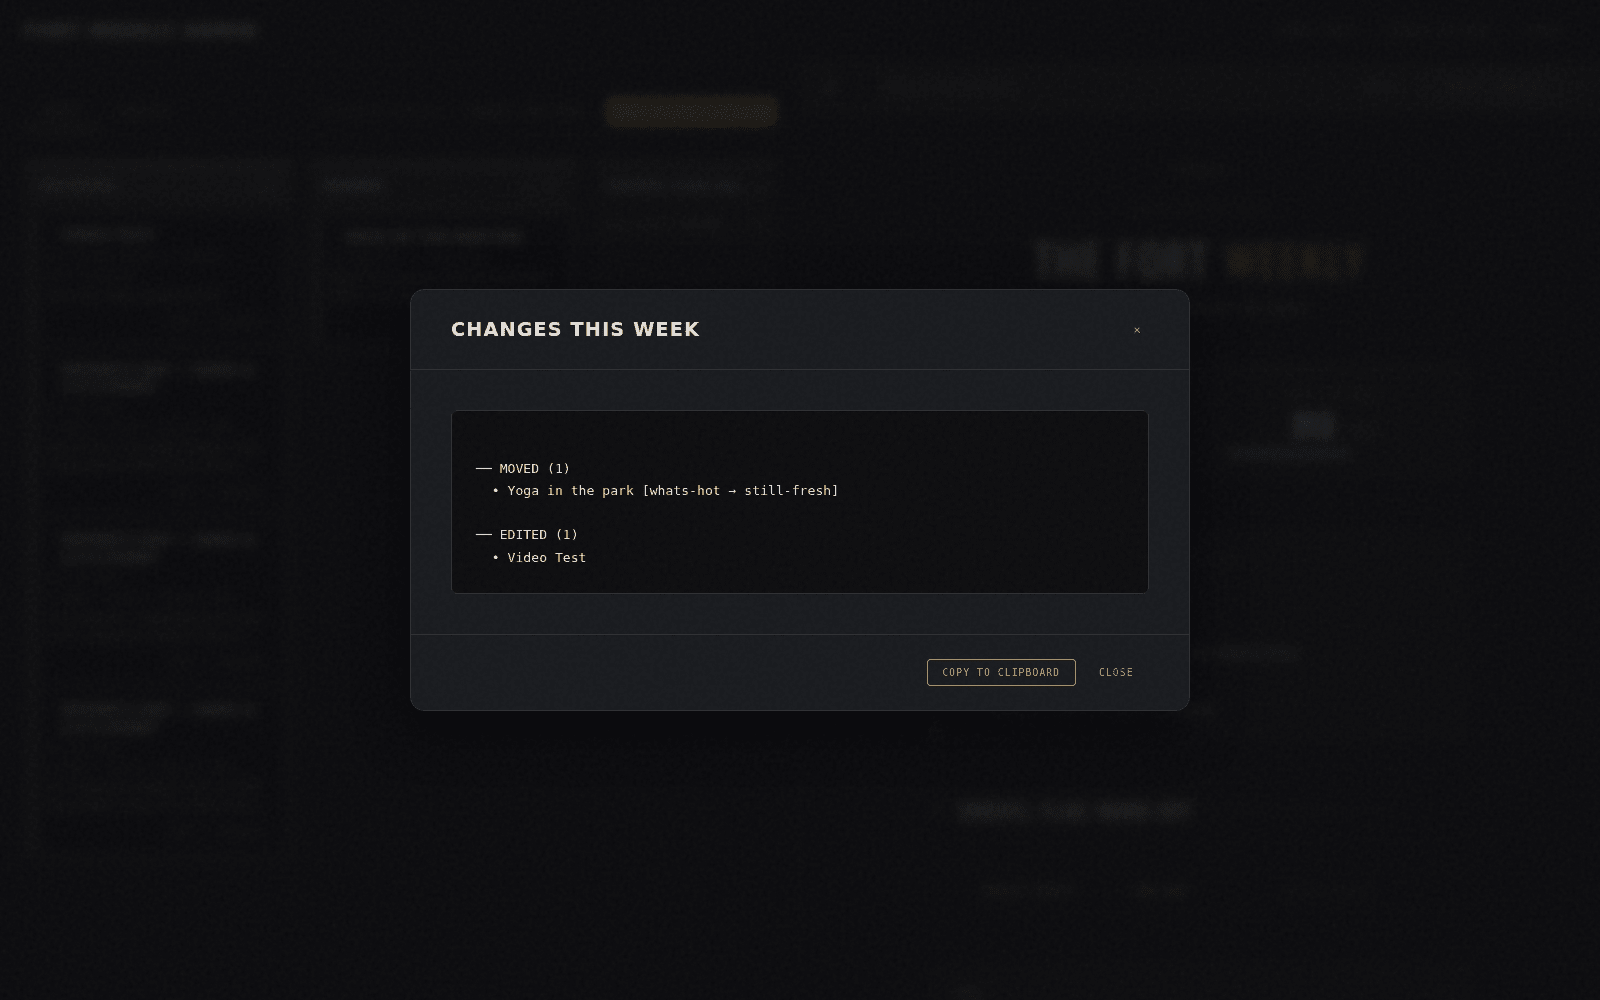
Changes This Week
A running log of every move, edit, and archive action taken since the last newsletter went out — handy for a final sanity check before creating the campaign.